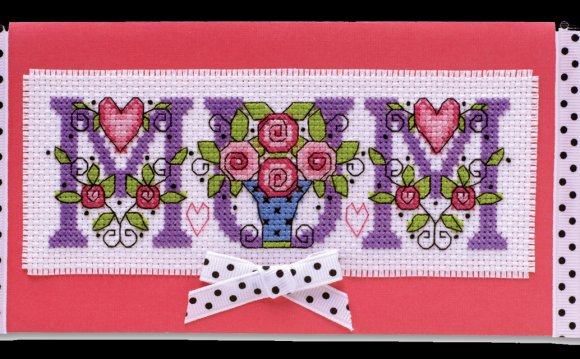
 Yay, it's almost Christmas! I just love this time of year, and writing my Christmas cards to friends is one of my very favourite things about the season - I'm a stationery nerd. Whip up an easy Scandinavian-style card for your friends with this quick and simple cross-stitch card tutorial.
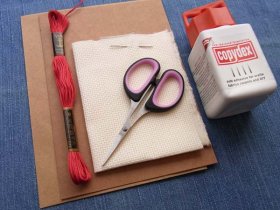
Supplies
- 14 count aida fabric
- Embroidery floss in red
- Embroidery needle
- Scissors
- Downloadable chart
- Plain greetings card (I used kraft card)
- Glue
Step 1
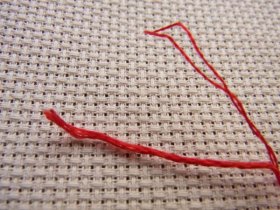
You don't need much to create this card, and it's super easy to get started. Take a small piece of aida (I've used 14 count, but you could make this any size, really, as long as your card is big enough for your stitching to fit on) and your red thread - you'll be using these first. Cut a length of thread around 12 inches long and separate out two strands of thread from the rest.
 Step 2
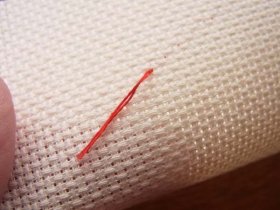
Thread your needle with the two strands and start your first stitch - insert the needle at the bottom-left corner of the first square. You can start from any stitch on this design, it doesn't matter too much, but I'd suggest starting with the very centre stitch and working out.
Draw the thread through slowly and steadily, so it doesn't tangle. Don’t pull too hard or the thread will come through and you’ll have to start again! Once the thread has been drawn through, leave a tail of a few centimetres.
Insert the needle into the top-right hand corner of the same square from the top side of the fabric and pull the thread through.
Step 2
Now repeat this to form the second leg of the cross. From the underside, insert the needle of the top left hand corner of the same square and pull the thread through, with the cross being completed by entering the bottom right-hand corner from the top side.
Step 3
 As you complete the second leg, catch the tail of the thread under your stitches to anchor them - this will stop your thread unravelling. It can be a little fiddly, so if you want to bend the rules, tie a knot in the end of your thread, you devil!
You can either do each stitch individually, or do rows of half stitches and then go back along the row and complete them, like this:
Try and keep your stitches neat and the crosses all going the same way - it is worthwhile taking time to do so, to keep things looking neat.
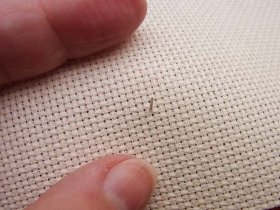
If you run out of thread, finish a stitch and on the underside of the fabric, weave your needle in and out of the back of your stitches a few times and draw the thread through, taking care not to go through to the front side. This will secure the end of your thread and stop any stitches coming undone.
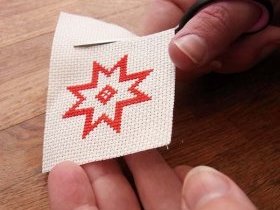
Carry on stitching until you've finished the star design. You should have something that looks like this:
Carefully count out six rows from the edge of your design and cut around in a straight line to make your piece ready to fit the card.
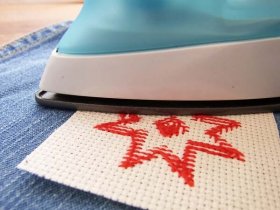
 Once you've finished cutting, gently smooth out your fabric and take a warm (but not hot) iron and with a spritz of water, iron the back of your stitches. You can use a clean tea-towel on top to protect them. Lightly press the fabric, taking care to iron out any wrinkles in the fabric.
To fray the edges for that irresistibly rustic Scandinavian look, simply peel off the outer block of threads that make up a row, on all four sides. Want it more rustic? Peel off two blocks!
You can either stick on your finished stitching straight or at a pleasing angle, like I've done - the margin for error is obviously reduced if you choose to angle it! Add a fine layer of craft glue to the back of your stitches - not too much or it will seep through. You may want to use some paper towel under the fabric to catch any spills.
Lightly press down the fabric onto the card in your chosen position. Once the glue has adhered, you can leave the card under a book for a while to flatten it down completely. Et voila - you're done!
Pop Your Card in the Post
In this tutorial, you learnt how to cross-stitch a Scandinavian-style greetings card. Now you just need to decide who to send it to! You could use this for other occasions, outside of Christmas, or even stitch it in a different colour.

RELATED VIDEO

RELATED FACTS
-
 Tyne & Wear Autistic Society (Adult Services) is an English public service organization established in 1994 to provide educational and vocational programs to local residents who are over 19 years old. They operate a school called Thornbeck College.
Students work...
Share this Post
latest blog posts
-

-

-

-
 Christmas cards offers November 9, 2023
 -
 CVS Christmas card November 5, 2023
 -
 Christmas cards Making November 1, 2023
 -
 Make your own Love cards October 28, 2023
 -
 Cards from October 24, 2023
 -
 American Greetings Boxed Christmas cards October 20, 2023
 -
 Make your own Valentine cards online free October 16, 2023
 -
 Print your own Christmas cards October 12, 2023
 -
 Card companies online October 8, 2023