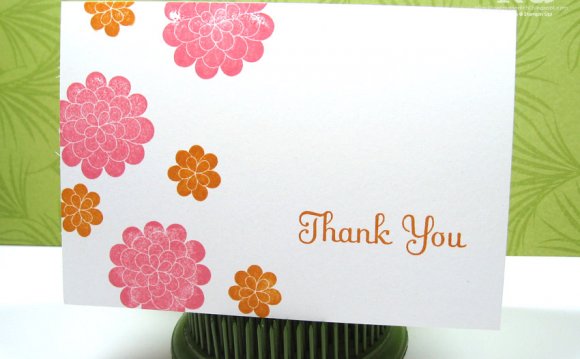
 There are many occasions in life that motivate us to show gratitude. Sending a handmade card lets the recipient know not only that you appreciate their gift, friendship or gesture, but also that you were touched enough to put forth extra effort to convey your thankfulness. I have created three creative Thank You cards to provide a bit of inspiration, each showcasing simple cardmaking techniques and details that are sure to be noticed.
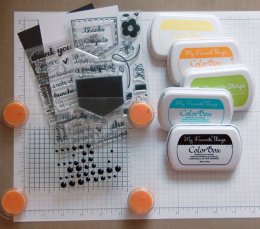
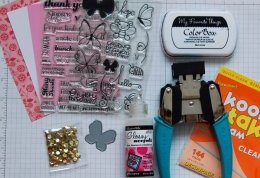
Supplies you’ll need:
- Image stamp and sentiment (I used Denim & Daisies and Many Thanks by Paper Smooches)
- Lined acrylic block or stamp press (I used a Fiskars Stamp Press)
- A rainbow assortment of inks plus black (I used Blu Raspberry, Limelight, Banana Split, Orange Fizz and Black Licorice by My Favorite Things)
- White and black card stock
- Enamel Dots
- Clear embossing powder and heat gun
- Adhesive
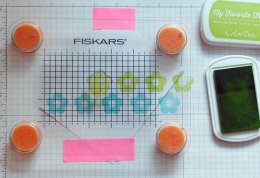
Step 1:
Determine the angle at which you want your images and/or sentiments. Using removable tape, secure card stock on grid paper at the desired angle. Adhere and ink stamp on press. While aligning the grid on the stamp press with the grid on the paper, stamp your first image. I have used the grid on the press also for spacing my images, leaving one block between each flower.
 I consider a stamp press to be another “must-have” stamping tool. The sponge feet allow a bit of wiggle room for perfect alignment every time.
Step 2:
Repeat the process using the other chosen inks. Be sure to stamp images that fall off the edge of the paper as well to create a continuously uniform pattern.
Step 3:
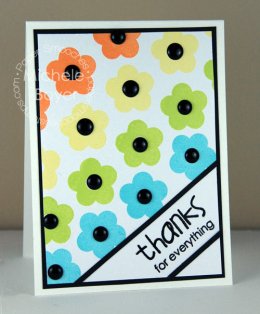
To finish the card, stamp sentiment in lower right corner and clear emboss for a bolder appearance. Add a thin strip of black card stock above and below the sentiment. Mat assembled piece onto black card stock and adhere to a white card base. Add dimension by adhering a black enamel dot in the center of each flower.
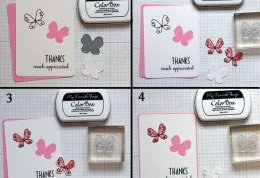
#2 THANKS Much Appreciated card
Raising a die-cut element, leaving the colored card stock below to show, is an easy way to add interesting detail to your heartfelt message.
- Image stamp with coordinating die and sentiment (I used Flap Happy and Many Thanks stamp sets as well as Butterflies 1 die by Paper Smooches)
- Black ink
- Pink and white card stock
- Gold sequins
- Foam squares
- Corner rounder punch
- Adhesive (I used Glossy Accents to adhere sequins)
 Step 1:
Cut pink and white panels to size and round corners. Stamp one butterfly and sentiment. Secure die in desired location using removable tape and die-cut image.
Stamp image twice onto patterned paper. Cut out images, cutting as close to outer edges as possible.
Adhere one patterned butterfly to stamped image. Adhere second butterfly to white die-cut.
Step 4:
Adhere white panel to pink. Slightly fold up butterfly wings. Adhere two layers of foam squares to top and bottom edges of wings. Apply adhesive to center.
Step 5:
Adhere butterfly to open die-cut area, pressing firmly in the center and holding until glue adheres securely.
Step 6:
To finish the card, stamp antennae and flight trails. Adhere sequins using clear liquid glue. Adhere assembled panel to card base.
#3 Thank YOU card
Create an appearance of multiple shades of color using only one marker.
- Open flower and leaf dies, scallop border die (I used Roses and Borders 2 dies by Paper Smooches)
- Sentiment stamp (I used Lovely Thoughts by Paper Smooches)
- Black hybrid ink
- White card stock
- Patterned paper
- Markers (I used Copic BG70 and R01)
- Hemp cord
- Enamel dots
- Foam tape
- Corner rounder
Cut white panel to size and round upper right corner. Stamp sentiment in lower right corner. Die-cut flower and leaves and adhere to panel. Color leaf openings with light blue/green marker and flower with coral marker.

RELATED VIDEO

Share this Post
latest blog posts
-

-

-

-
 Christmas cards offers November 9, 2023
 -
 CVS Christmas card November 5, 2023
 -
 Christmas cards Making November 1, 2023
 -
 Make your own Love cards October 28, 2023
 -
 Cards from October 24, 2023
 -
 American Greetings Boxed Christmas cards October 20, 2023
 -
 Make your own Valentine cards online free October 16, 2023
 -
 Print your own Christmas cards October 12, 2023
 -
 Card companies online October 8, 2023