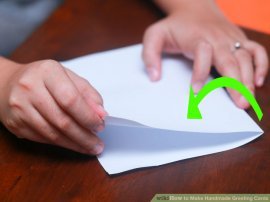
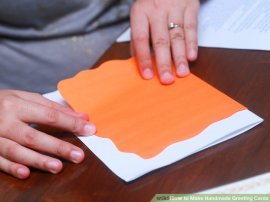
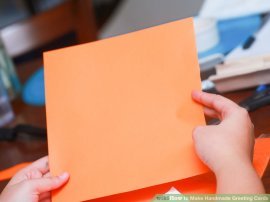
 Fold a piece of paper in half. The best kind of paper to use for card making is A5 cardstock paper. A5 is a medium-sized cardstock that is sturdy but folds easily. A4 cardstock is also used in card making. You can purchase cardstock at your local craft store.
- You can also use any kind of paper that you have lying around the house. Card making is a great way to use scrap paper that you otherwise might throw out. If you have a large, oddly shaped piece of scrap paper, cut it into a rectangle. Fold it in half like you would any other piece of paper.
- Keep in mind the person you will be giving the card to and the occasion for giving the card. Are you giving your grandma a card for Christmas? Perhaps cutting out a paper Christmas tree to glue to the front of the card would be nice.
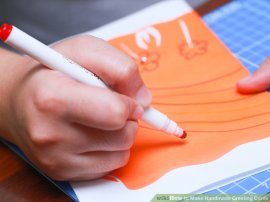
- You can also draw designs around your feature or use a ruler to create borders around your feature using brightly colored pens.
- Lay pipe cleaners along the edge of your card to create 3D borders.
 Decide whether you would like a greeting on the front of your card. You can purchase stickers with greetings on them, or you can hand-write the greeting. Do not add the greeting until you have glued everything down.
Part 2
Making Your Greeting Card- 5
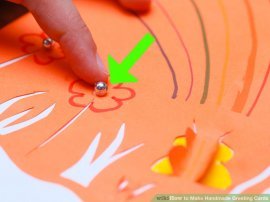
Put your design together. Once you have everything laid out on the card, take everything off the card but be mindful of where everything should be glued down. A trick to help you remember the different layers is to lay everything out from bottom layer to top layer on a table. That way you won’t get confused when gluing everything down.
- 6
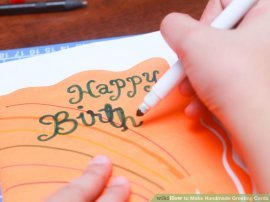
Write your greeting on the front of the card. This is optional. Write the greeting once you have glued everything down. If you have a sticker with a greeting on it, place it where you decided it should go when planning the card.
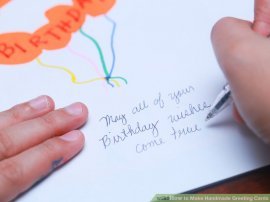
- Write your message inside the card. It can be as simple as ‘Hope you’re doing well!’ Or as detailed as a full length letter.
 Part 3
- Find a square piece of paper. The paper should be large enough that your card will fit inside the square when two opposite sides of the card are folded in together. To test this, turn the square so that it looks like a diamond. Fold the left and right corners in towards each other. Place your card horizontally on top of these two folded corners-if it fits within the border of the square, the piece of paper is the right size.
- You can either use a ruler to measure out a square on a larger piece of paper or purchase a square piece of paper with an interesting design at a craft store.
- 9
Place your square on the table so that it looks like a diamond. Draw an ‘X’ from each corner to it’s diagonal corner. Draw the ‘X’ lightly with a pencil.
- 10
 Fold the left (triangle A) and right (triangle B) corners in so that they match the lines of the ‘X’. Run your finger along the the outside edges of the two folded sections so that they stay folded.
 - 11
Fold the bottom corner (triangle C) so that its point is about half an inch above the center. It does not need to be exactly a half inch, but it should be close to it. Run your finger along the bottom edge so that the paper creases thoroughly.
- Place a piece of double sided tape on the inside points of triangle A and B. These are the points that are touching in the middle of the paper. The tape should be place on the bottom part of the point so that it runs from the point downwards along the bottom edge of triangles A and B. The tape should be about an inch long. It should be close enough to the edge that when triangle C is folded up and pressed against triangles A and B, you cannot see any tape.
- If you do not have double sided tape, you can use glue. Put a thin line of glue along the bottom edges of triangles A and B.
- 13
Press triangle C against triangles A and B. The double sided tape or glue should hold the triangles together.
- 14
Fold the top corner (triangle D) so that its point, or tip, folds over the tip of triangle C. This is the top of your envelope.
- Place your card inside the envelope. To hold the top down, place a sticker on the tip on triangle D so that the envelope is closed.
- You can also tape along the edges of triangle D so that the envelope is more thoroughly sealed. If you would prefer to do this, but do not like the way the tape looks, purchase tape with pretty patterns at your local craft store.
RELATED VIDEO

Share this Post
latest blog posts
-

-

-

-
 Christmas cards offers November 9, 2023
 -
 CVS Christmas card November 5, 2023
 -
 Christmas cards Making November 1, 2023
 -
 Make your own Love cards October 28, 2023
 -
 Cards from October 24, 2023
 -
 American Greetings Boxed Christmas cards October 20, 2023
 -
 Make your own Valentine cards online free October 16, 2023
 -
 Print your own Christmas cards October 12, 2023
 -
 Card companies online October 8, 2023