
 Sign in Submit a request My activities
Add a frame or border
- Let's spice up the photo before we put it on our card. On the Learning Center click Home, then Text and Graphics, and finally Add Frames and Photo Edges.
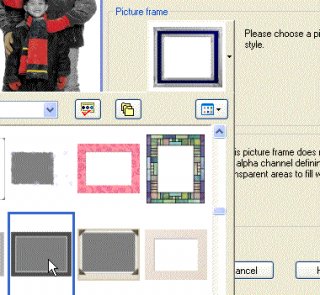
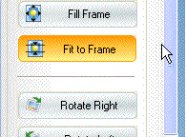
- To choose a frame, click the arrow next to the thumbnail of the picture frame. Here you can browse through the frames and photo edges. Just click the frame you like, you can adjust it using the options on the right side of the dialog box. When you're happy with the look, click OK.
- If you like, instead of adding a frame you can add a solid color border. On the Learning Center click Add Borders. Click inside the Color box to open the Materials palette, where you can choose your color. You can adjust the thickness of your borders by adjusting the numbers in the Size in pixels. All the numbers will change as long as you checked the Symmetric box. Click OK to apply the border. If you don't like the look just press Ctrl + Z to undo and try it again.
Save your work
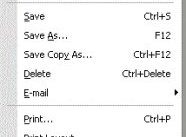
- Choose File > Save As and name the picture Holiday Card Photo. In the Save as type area, choose JPG JPEG (this makes it easier to find once we start creating our card in Snapfire). Click Save.
Open your photo in Corel Snapfire
- Choose File > Launch Corel Snapfire. In the upper-right corner of the Snapfire window, type Holiday Card Photo in the search box. Once you start typing, Snapfire will sort through your photo collection and return photos with the name Holiday Card Photo.
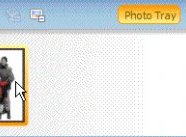
- Once you find your photo, drag it into the Photo Tray at the bottom of the Snapfire screen.
Create a card
- Click the Create button on the Task Panel on the left. Now in the Choose a Project area, click Greeting Card.
- On the Task Panel, under Create, click Select Layout. Now, under Style, you can choose a style that suits your card. We're going to use Single-Fold Card. You can also select a layout for your card. Choose a horizontal or vertical card, whichever is best for your photo. In this example we're using V1-b.
- Now click the thumbnail in your Photo Tray and drag it onto your card. You can position the photo on your card using the Position Photos tools on the Task Panel.
- Now click in the Add Text box on your card (if your card has that field). On the Task Panel, you can add your text, select the font, font size, color, and more. Play with the settings until you get the one that looks the best on your card.
Save and share
- Once your happy with the look of your card click the Save button at the top of the Snapfire screen. Give your holiday card a name and choose JPEG in the Save as file type area.
- Now you're ready to print or e-mail your card. Click the Home button at the top of the Task Panel and then click either Print or Share as E-mail. With Snapfire it's easy to spread the holiday cheer!
Source: support.corel.com
RELATED VIDEO
DIY Christmas Cards : How to Create Your Own Holiday Card ...

Eps17.Create your own holiday card together with our host ...
Create your own holiday cards with morewithprint.com
Share this Post
latest blog posts
-

-

-

-
 Christmas cards offers November 9, 2023
 -
 CVS Christmas card November 5, 2023
 -
 Christmas cards Making November 1, 2023
 -
 Make your own Love cards October 28, 2023
 -
 Cards from October 24, 2023
 -
 American Greetings Boxed Christmas cards October 20, 2023
 -
 Make your own Valentine cards online free October 16, 2023
 -
 Print your own Christmas cards October 12, 2023
 -
 Card companies online October 8, 2023