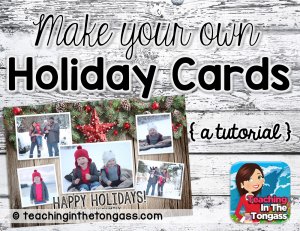
 In a few instances, I like to save money. Okaaaay, in almost all instances. You too? I thought so. If you're a teacherpreneur, well, heck, even if you're not, this is something you can do. I've even made it a tutorial you might want to send to your mom (you're welcome Mom!) so she can quit with the awful comic-sans-on-premade-holiday-letterhead-printer-paper holiday card (and yes, Mom, it's time to stop doing that).
A few weeks ago I realized it was a beautiful (albeit overcast) day here in Juneau, Alaska, so I knew I had to take advantage of the light. We loaded up the car and headed to our favorite camping spot out the road to take some Christmas photos. I brought my tripod, set my camera timer to 10 seconds and ran back and forth (with the toddler often chasing me and me having to grab him on the way back-which resulted in happy giggling all around anway). All in all it was actually pretty fun and I have some frame-worthy photos that really capture both my kids' personalities.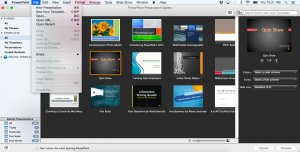 So, after you get your photos taken (if you haven't already), you'll be all ready for making the cards!
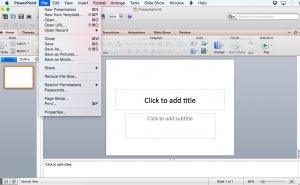
Open Powerpoint and go to File->New Presentation
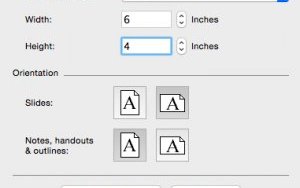
Go to File->Page SetupChange the page to the size you'll be printing your photos (you'll need to decide whether they'll be 4x6 or 6x4 (landscape or portrait).
Select and delete these default text boxes.
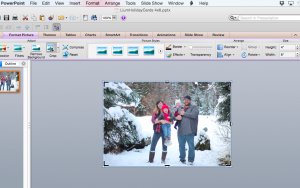
Drag and drop (or Insert->Picture) your background and photos. I pay for an annual subscription to stock photos, so that's where I found the background I used.
If you want to crop them, look for the square "Crop" button (you have to click the photo first) and crop the photo as you see fit by dragging the corners inward and clicking "Crop" again.
Now that you've cropped your photos, you might want to add a border so they "pop" out a bit more. When you click on the photo, you'll see some formatting options above. I used the "Simple Frame, White" option.
 However, I didn't like how thick the border was, so I needed to change the border size.
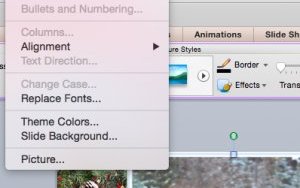
Go to Format->Picture.
In the "Line" options, go to the Weights & Arrows tab and change as you see fit (I changed mine from a "7" to a "4").
Drag and rotate to where you'd like. Have fun playing around!
Now for the words! Go to Insert->Text Box.
Type what you want and if you want to change your font, select your font and then use the dropdown font menu in the upper left.
See how my font doesn't stand out very well against that wood background?
Go to Format->Font.
In the "Text Glow & Soft Edges" option, I change the color to white and play with the size and transparency until I think it looks okay.
I also like to add a "Text Shadow" to make it stand away from the background.
See how a few formatting changes to font can really make a difference?
Add some more photos or text...
When you've finished your card, you'll need to save it as an image. Go to File->Save as Pictures.
When you save it, make sure you are saving it as a TIFF file (you'll change it later, but this is for anyone that wants better clarity-raise your hand teacherpreneurs!).
Open that file up after you've saved it. Go to File->Export.
Change the format from TIFF to JPEG.
Slide the Quality bar all the way to Best.
Ta-da! A high-quality holiday card you can be proud of!!! Upload to your favorite photo print place and order just like you would your regular photo prints (Shutterfly often has 101 FREE 4x6 promo deals-you just pay shipping) to save BIG on this year's holiday cards. I hope you've enjoyed this tutorial! Happy holidays!!!

RELATED VIDEO


Share this Post
latest blog posts
-

-

-

-
 Christmas cards offers November 9, 2023
 -
 CVS Christmas card November 5, 2023
 -
 Christmas cards Making November 1, 2023
 -
 Make your own Love cards October 28, 2023
 -
 Cards from October 24, 2023
 -
 American Greetings Boxed Christmas cards October 20, 2023
 -
 Make your own Valentine cards online free October 16, 2023
 -
 Print your own Christmas cards October 12, 2023
 -
 Card companies online October 8, 2023